Thursday, February 26, 2009

☺Another Fondant Cake☺

This was a request from a family member, well at least the colour scheme, must say it looks quite colourful. I enjoyed it as usual...☺ I was stressing a bit, because the fondant teared on the one side, but luckily it could be fixed with those nice circles☺Thank goodness for decorations~~~
It actually looks quite African inspired to me...
☺{The stringy bow on top was made from royal icing, and also "glued" to the cake with royal icing. The border was also piped royal icing. It is a chocolate sponge cake, with butter cream icing covered in fondant}☺


☺☺☺☺☺☺☺☺☺☺☺☺☺☺☺☺☺

Wednesday, February 18, 2009

۞♣♫♥Third times a charm~~~۞♣♫♥

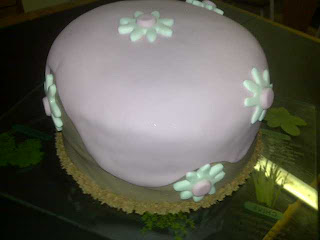
I decided to try my hand at a fondant cake again, it is a gift box cake, and thanks to the previous two practices im getting the hang of it... i've even decided to add a 3D bow on top. I've put before and after photos of the bow to give more of an idea as to how it is assembled. Take a look...


HOW TO MAKE A 3D FONDANT BOW


First cut 8 strips of 12cm in length and 3cm width. Then fold it onto each other glueing it together with a little bit of water, and then cut the end of the strips so it resembles an arrow. Also cut a 6cm x 3cm strip to make a circle and fasten it using water.


I let them dry over night by putting them on their sides and assembled it on the cake the next day, but you can also assemble it immediately and then just keep it from falling down by putting tissue paper inside some wax paper and put it inside the bows.
Ok, next... i baked the cake, made from scratch, i did a double batch of cake batter, any old cake will do. This is a chocolate cake it is very moist. Also i did it in 3 layers and iced it with butter cream icing


Chocolate Cake recipe


  • 250 ml Hot water


  • 125 ml Cocoa

  • 3 eggs

  • 15ml Baking Powder


  • 1ml Salt


  • 125ml Canola oil


  • 375ml Sugar


  • 450ml Cake flour


  • 5ml vanilla essence

Preheat the oven to 180 degrees celsius


Mix cocoa, hot water and oil together untill everything is dissolved. Let it cool. Beat the eggs and sugar untill it is light yellow and fluffy. Sift the cake flour, baking powder and salt and add to egg mixture then add the cocoa mixture mix well. Pour into pans and bake for 25 - 30 min. Remember to make double the batter if you want 3 or 4 layers of cake.


Next, ice the cake with butter cream icing


And after all of this is finished you can cover the cake with the fondant and assemble the bow...


I piped a border with butter cream icing~~
☼☼☼


ENJOY!!

Saturday, February 14, 2009

Cake Balls!!!

It looks like truffles, but it is actually cakes balls. They are simply delicious and very easy to make...


Want to make them??:
2 and a half packets of oreo biscuits crushed.
1 227g of Cream Cheese
Chocolate for melting
Mix the Crushed oreo's with the cream cheese, roll in balls, and put in freezer for 1 hour. Melt chocolate in a bowl and roll the chilled balls in the chocolate. Put in freezer for 5 minutes, take out and decorate. as easy as 1, 2, 3...

Thursday, February 12, 2009

Red velvet cake

I found a recipe for a red velvet cake, i have never had red velvet cake before. So i decided it was time, i made it from scratch, seeing as we dont have red velvet cake pre mix on the shelves. I must say it was awesome...especially with the cream cheese frosting...MMMmmmm and seeing as it is red inside i decided in honour of valentines day i would make it in a heart shaped pan~~~


Want to try it?
Here is the recipe~~~


Red Velvet Cake:

2 1/2 cups (250 grams) sifted cake flour
1/2 teaspoon salt
2 tablespoons (15 grams) Dutch-processed cocoa powder
1/2 cup (113 grams) unsalted
butter, at room temperature
1 1/2 cups (300 grams) granulated white
sugar
2 large eggs
1 teaspoon pure vanilla extract
1 cup (240 ml) buttermilk
2 tablespoons liquid red food coloring
1 teaspoon white distilled vinegar
1 teaspoon baking soda
Preheat oven to 350 degrees F (175 degrees C) and place rack in center of oven. Butter two - 9 inch (23 cm) round cake pans and line the bottoms of the pans with parchment paper. Set aside.
In a mixing bowl
sift together the flour, salt, and cocoa powder. Set aside.
In bowl of your electric mixer, or with a hand mixer, beat the butter until soft (about 1-2 minutes). Add the sugar and beat until light and fluffy (about 2-3 minutes). Add the eggs, one at a time, beating well after each addition.
Scrape down the sides of the bowl. Add the vanilla extract and beat until combined.
In a measuring cup whisk the buttermilk with the red food coloring. With the mixer on low speed, alternately add the flour mixture and buttermilk, in three additions, beginning and ending with the flour.
In a small cup combine the vinegar and baking soda. Allow the mixture to fizz and then quickly fold into the cake batter.
Working quickly, divide the batter evenly between the two prepared pans and smooth the tops with an offset spatula or the back of a spoon. Bake in the preheated oven for approximately 25 - 30 minutes, or until a toothpick inserted in the center of the cakes comes out clean. Cool the cakes in their pans on a wire rack for 10 minutes. Place a wire rack on top of the cake pan and invert, lifting off the pan. Once the cakes have completely cooled, wrap in plastic and place the cake layers in the freezer for at least an hour. (This is done to make filling and frosting the cakes easier.)

And for the Cream Cheese Frosting:

1 1/2 (360 ml) cups heavy whipping cream
1 - 8 ounce (227 grams) cream cheese, room temperature
1 - 8 ounce (227 grams) tub of Mascarpone cheese, room temperature
3/4 teaspoon pure vanilla extract
1 cup (115 grams) confectioners' (icing or powdered) sugar, sifted


Cream Cheese Frosting: In your food processor, or with a hand mixer, process the cream cheese and mascarpone cheese until smooth. Add the vanilla and confectioners sugar and process until smooth. Transfer this mixture to a large mixing bowl.
Then, in the bowl of your electric mixer, or with a hand mixer, whip the cream until stiff peaks form. With a large spatula, gently but quickly fold a little of the whipped cream into the cream cheese mixture to lighten it. Then fold in the remaining whipped cream, in two stages. If the frosting is not thick enough to spread, cover and place in the refrigerator for an hour, or until it is firm enough to spread.
Assemble: With a serrated knife, cut each cake layer in half, horizontally. You will now have four cake layers. Place one of the cake layers, top of the cake facing down, onto your serving platter. Spread the cake layer with a layer of frosting. Place another layer of cake on top of the frosting and continue to frost and stack the cake layers. Frost the top and sides of the cake. Can garnish the cake with sweetened or unsweetened
coconut

WHAT A FLOP...!!

O Boy!! It's almost Valentines day and i wanted to bake some Valentines day cookies and decorate them with royal icing, um it looks easier than it is to do... or at least if i practice a bit in the future i would probably get better i hope, because i am going to try this again soon.

But as the title reads this was a flop a real big flop!! At least they still taste good.

I think i have narrowed down where i went wrong:

the white RI was too runny, the pink even more so...

and the pink was fuuullll of bubbles which makes them look terrible

gosh i'm so embarrassed!!!

here they are...


I did some letters also...


Cake baking no.2

Okeee, so then i found out where to buy the fondant, but it is called plastic icing in South Africa, or at least where i bought it... now the first cake i baked, i didnt have a cake roller, have since bought one and i also bought round cake tins cookie cutters and a few other things.


Well, i baked a chocolate cake with chocolate pieces in it... would probably be termed double chocolate cake... and iced it with caramel in the middle and white butter cream icing underneath the fondant...


and here goes...


O i even bought a piping bag with tips and a coupler and did a border, practiced a bit and then gave it a go...
there is also a bit of glitter on the top...edible glitter.


Trying to bake

So after some surfing i came across a Mashmellow Fondant recipe, now if you have seen cakes decorated with fondant you would know they are beautiful.


I decided to make the MM fondant, not really knowing where i could buy fondant seeing as i have never used anything like this ( i have since then found out where) anyway i made the MM fondant, and then baked my square cake, i used too much batter for the second tin and it was leaking everywhere. But nonetheless, the cake turned out fine, well fine for a first timer i think.


Have a look...


Okay, so the bow isnt done very well but im learning... and as for the photography, i will work on that also...


Related Posts with Thumbnails